Tag Archives: cheap

Thoughtful Thursday – Last Minute Ideas To Save the (Holi)Day!

Grumpy Cat, meet Grumpy Dog. (slash Rudolph)

Put on that antler headband, and beat the bah-humbugs with our list of last minute holiday cheer!

Christmas is less than a week away, and yuletide is upon us. If you haven’t made your home festive (or you want to add some extra,) or if you just haven’t been able to come up with gifts for you friends, neighbors, or that relative that’s really hard to shop for, here are some last minute ideas to make your season merry and bright. (Click on the images for more info.)

Easy Decorations:

Simple, inexpensive, and elegant.


This has to be the prettiest, simplest tree I can imagine. Outline with lights and add paper cutouts of stars (or snowflakes!)

 all about the paper snowflakes

Speaking of snowflakes, here are some beautiful patterns to use!

20 minute crafter - make a giant star for less than five dollars - it is made from yard sticks.


Make an inexpensive outdoor star decoration with yard sticks.

..


Forego the can of fake snow, and break out your glue gun instead!

Free Printables:

Christmas Printable Freebie

Buddy the Elf printable.

Christmas printable


Holiday subway art printable.

Printable Christmas Banner!

“Noel” banner printable.

FREE Printable Christmas Gift Tags


Forget the expensive wrapping supplies. Use magazine or newspaper, plus these cute printable tags.

Quick Gifts:

I have to remember this for Christmas!!

An adorable gift for the women in your life!

Christmas on your stove. Made with Cinnamon sticks, dried lemon slices, dried orange slices, dried apple slices, cloves, nutmeg, allspice, bay leaf.  Great neighbor gift idea.

A natural home fragrance that smells like the holidays. A great gift for the neighbors!

DIY Lip Gloss using TWO ingredients!


What tween or teen girl wouldn’t love some pretty lip gloss in their stocking?

DIY Rosemary Mint Shave Cream


Whip up a big batch of this manly smelling shaving cream, and divide into small containers for a great gift. Add a straight razor (and print out a good how-to) for a gift the guys will use all year!

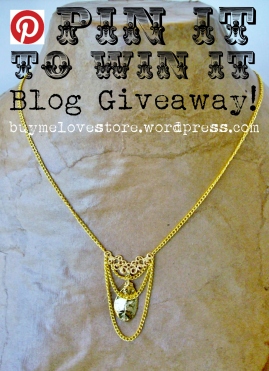
Of course, don’t forget our giveaway to enter to win this gift-able handmade necklace:


Share the Love,

Chelsea


Leave a comment

Filed under Thoughtful Thursday

Happy National Earth Month!

Happy Earth Month, everyone! I’m so glad to see that the earth-friendly living “trend” isn’t just a trend anymore, and that people are taking notice how much we affect the earth around us. A large part of our business is reusing and repurposing the old into new items to make a positive ecological impact.

The other day on my other blog, Chelsea, Like England, I wrote a post about easy upcycling projects you can do around the house as you do your spring cleaning.

I received an email today from Michaels with lists of re-useful projects, including fashion, furniture, decor, and even a block party idea to celebrate Earth Day. They’re also teaming up with American Forests to plant trees with just a simple text.

Ten for Tuesday Pledge

Just a few days ago, I reposted this pledge on our mission’s Facebook page, encouraging our students to pick up ten pieces of trash each Tuesday. This works anywhere, of course, not just on a college campus, and it’s a great way to celebrate Earth Month way beyond April.

Share the Love,

Chelsea

2 Comments

Filed under Uncategorized

Make It Monday – A Very Belated Reveal

Um, wasn’t Halloween yesterday? No, wait, that was Christmas. Where did the time go?!?

Anyway, here’s the very belated reveal of my finished mermaid costume and our Trunk Or Treat decorations:

It’s hard to tell that I’m super glittery in the pics, but I assure you I was glittery for a week after! (And it was the glow in the dark kind …)

Share the Love!

Chelsea

1 Comment

Filed under Make It Monday

Make It Monday – Look at this stuff, isn’t it neat? How to be a mermaid.

Last year was our first year participating in our church’s Trunk or Treat event as Dorothy and the scarecrow, and I did a tutorial about ruby slippers. This year, after a failed attempt at a theme based on the movie “Up,” we’ve decided to be a mermaid and a pirate! When I was a little girl, one of my favorite movies, like so many little girls, was The Little Mermaid. (The only difference between me then and little girls now is that I got to see it when it came out in theaters!)

I have to admit, we’re cheating a little. Remember the pirate costume we put together for the hubs for the renaissance festival?

Yarr.

Yeah, I think I’ll make a vest and call it a day. With a costume as elaborate as a mermaid, I need all the extra help I can get. Especially considering our car’s trunk is going to be dressed up as a giant clam shell. Uh huh.

The pirate costume consists of a thrifted large ladie’s linen shirt (a t-shirt will do,) thrifted men’s linen pants, jaggedly cutoff (khaki will do,) a head scarf (or a hat!) a belt, a piece of “creepy fabric” from the dollar store tied at the waist, and plenty of jingly and sea-shell-y jewelry (thrifted and from home.) Hubs just happened to have a wooden sword – don’t ask. Add black, smudged eyeliner, maybe an eyepatch, a scar or two, and you’re a pirate! A tried and true, easy & traditional costume.

Now for the mermaid.

The unfinished costume.

 Let me first say, I still need to add fins to the bottom of the skirt, using blue and green tulle. I got lucky and scored a bright red (unused) wig from Goodwill for $5, that I’m excited to be able to reuse for costumes like Poison Ivy, Jessica Rabbit, and other fantasy creatures. Any time you can find an “investment” costume piece, go for it!

I made “face fins” inspired by a cool makeup tutorial: http://youtu.be/b5DkwjEelW0. I used blue floral wire and the same tulle as my tail fins, then got a little fancier and hand sewed gold and green sequins to the tulle with gold thread. The tutorial will teach you how to shape and attach the fins.

The “bra” shells are made from purple felt and scraps of iridescent fabric. I drew a simple pattern for the shells about the size of my bra cup, then traced the pattern with a marker onto the felt. I did the same with the iridescent fabric, marking a pretty wide margin outside the line of the pattern. After cutting out the shell shapes, I began stitching the iridescent fabric on top of the felt, puckering the iridescent fabric to create ridges, and gathering the straight stitches tightly to creat a slight curve to the shell. Then I stitched the outline of the shell, and added some natural shells and fake pearls to the bottom of the “cup.” In the picture, the shells are just pinned onto a nude tank top. I plan on pinning them a little higher with safety pins on Halloween. 

I created the tail from stretchy metallic knit that I had leftover from a goddess costume. The fabric isn’t the cheapest (I found it on sale,) but you only need a couple of yards. I traced a fitted, pencil-style skirt with chalk on the back of the fabric, down to knee length, marking where the knees were, and then tapered off into a v-shape at ankle length. I folded the top of the waist on each piece down and sewed to create a neat edge. Then I pinned the pieces (pretty sides together) and sewed seams down to the mark I made for knee length. I sewed a zipper into one of the side seams – it’s really easy! – and cut the excess fabric from the seams. The end result is a tail-shaped fin with slits on each side from the knee down. I plan to cut tulle into fin shapes and sew it to those slits to create the illusion of a mer-fin. Similar to this:

Another great idea for a pin-up style mermaid!

There are so many different ways to do mermaid makeup, I won’t even attempt to suggest one to you. Youtube and Google are full of ideas from natural looks to wacky ones, like the link a few paragraphs up. I will, however, suggest some false eyelashes! I was able to find some in red to match my wig. I also found some fake pearls in colors to match my costume, along with some abalone shell beads, and I’m creating some very under-the-sea jewelry.

As far as the giant shell for our trunk is concerned? You can see it peeking out at the bottom right corner of the pic of my mermaid costume … it’s made from 6 pieces of foam board, cut with a razor, painted with acrylic and accented with some glitter. I’ll either tape or “sew” it together with monofilament (fishing line) and cut a hole in the middle piece of the bottom portion of the shell for a stool to sit on. I’ll sit and blow bubbles as the pirate hands out candy from our treasure chest – a plastic shoe box covered in wood-grain contact paper, accented with a skull and crossbones cut from a styrofoam headstone.

I’ll be sure to post pics of the end result next Monday! Do you have a cool mermaid costume to share?

Share the Love,

Chelsea

1 Comment

Filed under Make It Monday

Make It Monday – Paperclip “Chandelier” Project Result

Finally! The paperclip chandelier project is complete:

Colored paperclips and faux multicolored crystals.

The project took about half a day to make. If I had been working from a pattern, it probably wouldn’t have taken as long, but I decided to be brave and go without one. I altered the project by using multicolored paperclips and adding “crystals” – because you can’t have a chandelier without crystals! I eyeballed the size I needed, made the wire hoops, and started linking the paperclips in a triangle/diamond pattern. The hubs came home to a colorful surprise – and he really likes it. Which is good, considering it’s above the desk he uses in the kitchen. Since I already had the steel wire, this project cost me less than $2 in paperclips; well worth the investment.

This is the third and final of the first group of top 3 projects I picked last month. I’m so excited to finish the list and move on to new craft projects! Next Monday, I’ll list my next 3 projects to complete.

What are your top 3 project picks?

Share the Love,

Chelsea
2 Comments

Filed under Make It Monday

Make It Monday – Top 3 Project Picks

My “favorites” list is getting longer and longer because of the “creative projects” folder I’ve created! Since I’ve stumbled on dollarstorecrafts.com, the list has grown rapidly.

So, for the sake of avoiding being overwhelmed by crafts – which is hard to do when you make things for a living! – I decided to pick my top 3 to finish before moving on to other crafts. I should probably come up with a deadline, too, but since I have so many ideas running around in my brain for the new shop, I’m not sure how much free time I’ll have to craft “recreationally,” haha!

Top 3 Crafts I’d Like To Complete (Soon So I Can Move On To Other Crafts!)

1. Braided T-Shirt Necklace.

Click the link to view the picture and tutorial! I’d like to make a version of this necklace with more strands, to make a true statement piece.

2. No-sew recycled t-shirt bag.

This tutorial is awesome, and will probably be the first craft I finish, since it’s so easy. Sensing a theme, here? Yeah, I have some shirts I don’t want to get rid of, but that need a new life, and I can never have enough purses and bags. Actually, I may end up sewing the bottom of these bags; I think it may be just as fast as making a drawstring!

3. A paperclip chandelier.

Here’s the really ambitious project. I bought a bunch of multicolor paperclips to make a more colorful version of this insanely ingenious craft. Really, to me, it’s a piece of art. I can’t wait to make this and put it over the bare bulb hanging in the kitchen. Part of the fun of this project is that I don’t plan to buy the $9 tutorial. Yeah, I was that kid who didn’t like to read the Lego directions. I like to figure things out for myself.

So, there’s my crafting commitment! I hope to get all three of these done within the next month. I’ll post updates on my progress, so you guys can see how the crafts turned out. 🙂

Share the Love,

Chelsea


5 Comments

Filed under Make It Monday

Whatever Weekend – Feeding The Addiction

Ok, I confess, I’m addicted …

to dollar stores.

I don’t have a hard time not shopping at large retailers like Target, Walmart, or big-name clothing stores, but dollar stores? They’re my weak spot. So, coming from a gal who likes to thrift and make things rather than buy them, but obviously has issues when it comes to $1 tags, you can imagine how elated I was when a friend recommended dollarstorecrafts.com!

To be honest, I do try to buy things from the ol’ DS to use for supplies for craft projects, like the Wizard Of Oz trunk or treat decorations, or the halloween wreath I made. It’s nice to finally get some inspiration, though, for those things that I want to buy but can’t justify with a purpose. My friend (and other friends, if they like!) will be crafting it up on the cheap in the very near future, and I can’t wait.

In reference to another obsession of mine, Tom and I visited the Log Cabin Village in Fort Worth, followed by a very hot lunch at the Botanic Gardens down the street. The obsession here is inexpensive and entertaining dates. One of our first dates together involved the Wendy’s dollar menu, a park, and touring the outside of my old elementary school. We’ve been on a roll ever since!

Outside the log cabin where my grandfather was born! It made an extra special date to share some family history with my hubby.We both love it when art and function meet. This butterfly chair was amazing, and luckily there was a kind stranger nearby who offered to take our pic.

The normal routine starts again tomorrow. The center opens for the summer, Tom starts summer school, and Mom and I commence our regularly scheduled doctor visits and brainstorming sessions! Just in time for 100 degree weather.

Share the Love,

Chelsea


Leave a comment

Filed under Whatever Weekend